Translate

Showing posts with label Pantry basics. Show all posts

Saturday, April 16, 2016

Chef Tips for Keeping Herbs, Day 16 Self-Love Detox Challenge

               
Bonjour!

We all know the frustration of losing expensive and needed for recipes herbs. Well, we Chef's have a way of keeping them fresh for as long as possible. Every professional kitchen stores their herbs in a metal food bin with water in the fridge. This works well but in those kitchens there is high turnover of food because they are used daily in recipes. It's rare that ingredients like fresh herbs go bad for want if use. But what about the home cook? How can we keep them lasting as long as possible with minimal fuss? Well, today I am showing you an easy method and it will come in very handy for your rawfood/juicing ingredient's that you are tired of throwing out, because they have expired too quickly. So, how do we go from wilted and useless:
                           
To this beautiful happy, healthy, ready-to-use a week later loveliness? Let me tell you.
              
Herbs are different and respond to specific methods of preservation in ways that will surprise a novice.its important to respect what the plants are telling you with non-verbal cues. What are you talking about Kiki? Well, if you take a moment to look at your herbs you will see that some have variegated leaves, these are the one's that really need water to stay looking plump and fresh. It's the same concept as with wilted lettuce, sprinkle some cold water on wilted lettuce leaves and wait 5 minutes, they will spring back to life! If you look at herbs and flowers like thyme and lavender, these don't do as well immersed in water. Their small tight leaves have a tendency to give way to rot when sitting in water. These are better used ASAP, dried, or placed in olive oil and frozen to preserve for later use. Today we are focusing on mint and Italian parsley.
             
Just purchased and out the bags (keep the bags), I pick them over, remove & discard any rotten or going leaves, then rinse well in cold water. This works for most herbs with the exception of dill & sage, these end up looking like drowned rats and are made more difficult to handle when wet. 
              
Mason jars or re-purposed clean old glass jars are perfect for this exercise. Fill them halfway with cold water, go over your herbs and make sure nothing yellowing or rotten remains; as these can speed up decay in healthy remaining herbs. Slimy stuff is not good either and needs to be rinsed & removed.
          
Grab your cleaned and rinsed herb bunch, one herb at a time, and place it with the elastic still on in the water; just like the picture above.
           
This is where that plastic bag it came in, comes in handy. Make sure there is nothing rotten or sandy in it by shaking it out, gently place over the herbs and bring the bottom of the bag towards you. Gently twist the end of the plastic bag to form a tight twist. Fold this while wrapping the plastic bag so that it holds snug to the jar.
          
Grab a pair of scissors and CAREFULLY cut little holes around both sides of the bag, around 6. This was an old trick a gentleman in the produce department at a health food store I worked at taught me. He explained that because these were living plants, they require air and some water to live as long as possible once harvested. Brilliant! And it works. Store these in the fridge on the door or nearer to the front where freezing will be less likely, as some fridges are very cold in the back & this can be damaging to delicate herbs.
         
This method can be used for herbs like mint, parsley, coriander and I even use it for my scallion aka green spring onions-just remove yellowing stalks as needed. Every 2-3 days I change the water and inspect them for yuckie bits that need to be removed. These next pics are of the herbs a week later:
         
Parsley
                        
Mint

I hope this helps, leave any questions or comments below and don't forget to subscribe. Have a blessed day! 


Monday, February 8, 2016

GF, Vegan 5 Spice Lemongrass Chinese BBQ Sauce with 5 Spice Mix Recipe Included

                
Good morning loverlies!!!!!
Yup, I am really hyped up about this blog post. It leads to such yum-scruminess, that I cannot contain the joy, and must pass this lusciousness your way.
I went searching for a gluten-free hoisin recipe because there were some delicious Chinese meal options I have been missing out on for quite some time now, and I decided that just would not do.
I stumbled upon a tasty recipe and had a go at it, turned out to be fantastic and with some small adjustments of the nit picky Chef kind, I got something that has become a great base for other sauces.
Particularly for my 5 Spice Lemongrass Chinese BBQ sauce. I am breaking this recipe down for you in the 3 parts required to make the awesomeness that is Tofu Puffs with said BBQ sauce, see for yourself how lovely she looks:
                       
Deeelish-ums indeed! I wish you could scratch and sniff, the smell alone will give you happy face. It permeated the whole house when I made it and there were zero leftovers, a big hit for sure and the best parts? No MSG, no gluten, vegan, real ingredients, no refined white sugar, cheaper for your wallet than having to always order take-out, no artificial colours or gross caramels, you will have plenty to use for several meals, you can give it as a gift to the foodie in your life, and a kapow to your taste-buds! Down for the count, this sauce has officially K-o'd everything in the sauce department. Shabang!!!!!
Okay enough sillies, seriously though, you have got to make this sauce. I will be posting the recipe for the tofu puffs in the Chinese BBQ sauce, this week so you can surprise your love for Valentine's day and have an extra romantic night in.

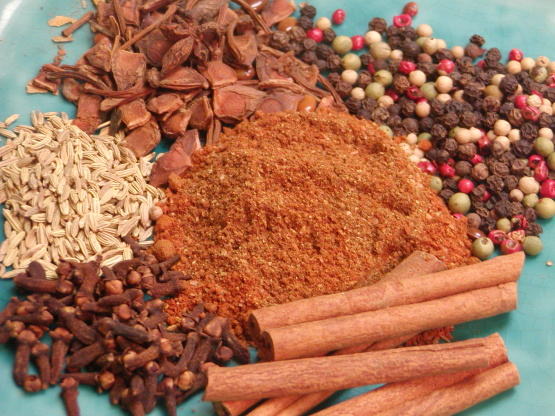
Let us begin with the vibrant 5 Spice powder mix. I don't know if you have ever come across this before but it is big in cuisine all across Asia and the variations are endless. Here are a few pictures I found on-line for different ingredients: First one is from food.com, the second is from finecooking.com, and the last if from delmonte.ph.


Everyone agrees that star anise, fennel, and cinnamon are always to be a part of this mélange. I personally have about 3 different variations I do which are based on the type of recipe I am doing, the end product flavour profile I am aiming for, and what spices I have in the pantry that make it all possible. I have also been known to cheat and make it a 6 Spice powder on occasion. I did not take a picture of my spice mix but found this one from chowhound.com that looks exactly the same, they all pretty much look alike anywho, so no worries.
                               

Chef Kiki's 5 Spice Mix for Hoisin Sauce  (Part 1)                                                                  

Ingredients:
(Please note that for this recipe I DO NOT use pepper of any kind. Schezuan peppercorns or pink or black peppercorns are traditionally used in 5 spice powder but I found this recipe tastes better without.) 

1 Whole Star Anise 
5 Whole allspice
1 tsp ground cinnamon
1 tsp Whole fennel seeds
1 Whole Clove

Method:
In a mortar and pestle, grind all spices down to a powder. If you do not know what a mortar and pestle look like, here is a picture of marble one's, which are what I use:
                                
Store your spice mix in a small airtight mason jar until ready to use, feel free to triple the batch if you want to have more on hand for later use and you may also add pepper if you prefer it with.

Now we move onto the hoisin sauce, the original recipe apparently comes from Goop site which is supposedly Gwyneth Paltrows site, I came across a version that was on onehungrymama.com and I proceeded to change it slightly and make it gluten-free along with adding or adjusting ingredients and method. Here is my version for this lovely hoisin sauce, it's pretty close to the original.

Chef Kiki's GF, Vegan, Hoisin Sauce  (Part 2)

Ingredients:
(I prefer organic for this recipe but do what you can.)
1/4 Cup of Gluten-free Tamari Organic (Soy sauce is fine, just make sure it's gluten-free)
 1 1/2 Tbsp Kiki's 5 Spice Powder (see recipe above)
1/2 tsp Toasted sesame oil Organic (not the same as regular sesame oil, cannot be replaced)
2 Tbsp Grapeseed oil Organic
2 Cloves medium Garlic
1/2 Cup Maple syrup grade B (The darker one)
3 Tbsp Rice vinegar Organic
1 Tbsp Tapioca starch mixed with enough water to make it a very thick paste, about 2 tsp.
*2 Tbsp Massawippi*Organic Miso 

 Method:
-In a small saucepan, add Tamari, sesame oils, maple syrup, garlic clove, spice, maple syrup, vinegar. Bring to a simmer whisking often, add tapioca starch mix by whisking in. Turn off heat and cook 1 minute while whisking to thicken it.
-Add miso off the heat by whisking it in.
-Allow to cool while you make the BBQ sauce mix.

5 Spice Lemongrass Chinese BBQ Sauce  (Part 3)

Ingredients:
1 Recipe Hoisin sauce
1 1/2 tsp Grated fresh ginger 
3 Cloves Garlic crushed
1/4 Cup Organic Gluten-free Tamari
1/2 tsp Toasted sesame oil(not the same as regular sesame oil, cannot be replaced)
3 Tbsp Organic Rice vinegar
1/4 Cup Organic Honey
3 Tbsp Maple Syrup
1 tsp 5 Spice mix
1 Tbsp Lemongrass (I use the frozen pre-chopped from Asian markets)

Method:
-Whisk all together in a bowl, bottle and keep refrigerated until ready to use.
-I usually use 1/3 Cup of sauce for a 2 portion serving of tofu or fish or meat. Meat tastes better when it marinades overnight.

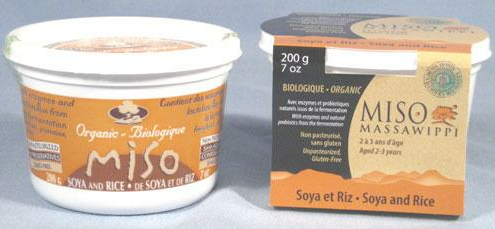
Before I get to the pictures, I am going to drop some Miso knowledge on you. We get this wonderful Miso at our health food stores here in Québec, that is like nothing else I have ever used  in all my years of Macrobiotic, Raw Vegan, Vegetarian, Cheffing! It is so unique, so robust in flavour tones, and has a load of health benefits. Here is the lowdown from the company along with a link, and I have included a picture. If you cannot get this then use any Miso you like, just not Barley Miso as Barley HAS gluten.

5 year-old Special Vintage Soybean and Rice Miso

A Gluten Free Product


Our special 5 year-old vintage organic soybean and rice miso is arguably the best of all misos we have produced so far. Due to its unique blend of ingredients, we have been able to extend its natural period of fermentation to 5 years. The result is the "best blend", where all of the components come together in a balanced, full-bodied, exceptional flavor. Like all of our misos, it is produced using only the highest quality organic products, certified non-GM.

• Whole organic soybeans high in protein content. We prefer to use locally or regionally produced soybeans from the Eastern Townships, central Quebec or the Mauricie region.

• Whole grain semi polished arborio rice from Italy. Having tried several types of rice from various parts of the world we opted for round grain rice that lends itself best to fermentation and gives our miso its unique flavor.

• Sea salt.

• Natural spring water.

• An inoculum of Aspergillus oryzae and a selection of lactic bacteria such as Pediococcus halophilus and Lactobacillus delbruekii.


Easy to make and keeps for a few weeks in the fridge, you must refrigerate this sauce!
          
Recycle baby! I reuse my kombucha drink containers by cleaning off the sticky labels. First I peel them, then they sit in a bowl with a solution of 2 parts baking soda to 1 part olive oil with a good squirt of dishsoap which I make into a paste and rub all over the place where I removed the label. I allow it to sit for 10 minutes and usually a good scrubby wash takes it all away. These particular bottles were very scummy and required a second solution slather and soakage.
              
I then used a funnel to pour the sauce in, normally I place the bottle and funnel together in the sink as I pour to avoid problems but I wanted you to see the method properly.
Artsy fartsy play time came next, I used my calligraphy fancy marker I recently splurged on and cut out a cardboard tag then I wrote what it was and glued some pretty paper cut out hearts with a glue stick.
            
DIY fun! I used a hole punch and punched a place to wrap rustic twine into it and then twirled it around the bottle. She looked so purdy when she was done and tastes freaking scrumptious! You must make this, I am posting the tofu puff vegan GF recipe soon, soon, I promise, so you can make it for Valentine's. Will link to this post when the time comes, aiming for Thursdays.

Made it, here is a pic & the link:
                              
               
                                                                Plain Jane
                            
                                                    Too sweet and sassy...
           
Enjoy and leave comments down below, I love to hear from you!


Friday, October 2, 2015

Strawberry Apple Fruit Slather & Ode to Fall Starts


As we begin our ode to fall, I am including a simple, delicious and pretty, fruit slather. It uses up the last batch of Quebec's summer strawberries, with the addition of apple and maple syrup; which is still in the fall vein. Think of this as a sweet summer goodbye and a bright fall helloodles!
I am big on buying and using locally grown and sustainable foods/goods. Especially from small local businesses. It's better for the planet, freshness, quality, interesting varieties that are waiting for discovery, and most importantly it helps out our neighbors. This means that we in turn are growing our economy and showing that we care about what goes on our plates and what the impact of our purchases are. I hear many people frustrated with what's happening in the world but unsure how they can affect change. The easiest way is to make a difference through your buying power, I know organic is not always feasible but try to switch to organic for things like carrots and celery or kale. Make an effort to check labels and look for the local name, avoid gmo's and push for mandatory labeling of these Frankenstein foods. Most importantly, don't buy food with ingredients you can't pronounce, don't recognize as food, nothing artificial, and stay away from too much sugar, bad fats, and salt. In the meantime, here's a pretty recipe, feel free to use frozen strawberries if you need, just reduce the juice by half. This recipe is different than the compote as it is thicker, it holds up well as a topping and pre-cooked pie shell filling or maybe even a turnover filling.

STRAWBERRY APPLE FRUIT SLATHER
Ingredients:
Strawberries
1 Apple for cooking
1/2 Cup Real apple juice
1/4 Cup Maple syrup
2 Tbsp Organic coconut sugar
1 tsp Vanilla extract
Pinch pink sea salt
1 Tbsp Potato starch mixed with water to form a thick paste, about 2 Tbsp.

Method:
-In a medium non-reactive, heavy based saucepan, add all *ingredients EXCEPT maple syrup and potato starch. Keep the last two aside for now.
-Bring what is in pot to a boil, reduce heat to medium and stir.
-Add maple syrup and stir. Allow to cook on medium heat for 20 minutes, stirring occasionally.
-Add potato starch/water mixture into pot, stir right away until thoroughly incorporated. Allow to cook for 2-3 more minutes until thickened. If you run your finger through the back of a spoon coated with the mixture, it should leave a line. Turn off heat and remove to hot plate, allow to cool.
-Once cool, you can fill in jars. This recipe is not a canning recipe, it is really meant to be kept refrigerated and eaten within 2 weeks maximum.
-You can use the filling in an already cooked pie shell, as a dessert topping for cake/coffee cake, on ice cream, to layer a parfait, serve with pudding or whipped cream. The possibilities are limited to your imagination. I love it on toast and to eat just by itself with yogurt.


                                           Local labels, check for em'.

                                          These strawberries made my heart happy.

                    Use only real brown, fresh squeezed apple juice. Not that yellow pee-pee yuck.


Chef's try to pretend they don't make mistakes, pthhhhh.
Look at this mess I made when I started washing the dishes and turned my back to the pot. I made a messy booboo and that's fine, just clean up after yourself like I did, once it was cool to the touch.
I reuse a lot of glass jars, I like the look of them with finished food products I make, plus they are much more easy to sanitize. I like the different shapes and specialty bottles with cool glass add on's.


I hope you enjoy the recipe, leave your comments down below and don't forget to subscribe.
Happy October everyone!

Friday, February 27, 2015

Paleo Bone Broth aka Stock


This recipe is a basic brown stock that is one of the first recipes you learn in culinary school. What makes it Paleo are the quality of the ingredients along with the addition of a special ingredient to make it more gelatinous. But first, information on the wonders of Bone broth & all it's fantastic health benefits! I got this information from Dr. Josh Axe's site because he is knowledgeable, a trained professional, and specializes in the issues I suffer from. His focus on thyroid, metabolism, autoimmune, weight management, healthy & natural alternatives, make him a great source of info. By the way, I have not been paid to say this.


Straight from:
http://draxe.com/the-healing-power-of-bone-broth-for-digestion-arthritis-and-cellulite/

All bone broths beef, chicken, fish, lamb and more are staples in the traditional diets of every culture and the basis of all fine cuisine. That’s because bone broths are nutrient-dense, easy to digest, rich in flavor and–they boost healing.

Bone broth or stock was a way our ancestors made use of every part of an animal. Bones and marrow, skin and feet, tendons and ligaments that you can’t eat directly, can be boiled then simmered over a period of days. This simmering causes the bones and ligaments to release healing compounds like collagen, proline, glycine, and glutamine that have the power to transform your health.

Nutrition researchers Sally Fallon and Kaayla Daniel of the Weston A. Price Foundation explain that bone broths contain minerals in forms that your body can easily absorb: calcium, magnesium, phosphorus, silicon, sulphur and others. They contain chondroitin sulphates and glucosamine, the compounds sold as pricey supplements to reduce inflammation, arthritis and joint pain.

A study of chicken soup (broth) conducted by the University of Nebraska Medical Center wondered what it was in the soup that made it so beneficial for colds and flu. They found that the amino acids that were produced when making chicken stock reduced inflammation in the respiratory system and improved digestion. Also, research is proving it can also boost the immune system and heal disorders like allergies, asthma, and arthritis.

Sally Fallon explains that most store bought “stock and “broth” today aren’t “REAL”. Instead, they use lab-produced meat flavors in bouillon cubes, soup and sauce mixes. Also, manufacturers began using monosodium glutamate (MSG), which is recognized as a meat flavor but in reality is a neurotoxin.

Thank you Dr. Axe! There's loads more info should you need it, on his site.

Now we get down to the recipe!
If you want real bone broth you have to make it yourself at home. Here is my recipe which is from culinary school with slight modifications.


(There is nothing fancy in the chopping method as you will be straining this stock once cooking is complete. Try to use organic ingredients wherever you are able to.)The preparation is called Mise-en-Place, in professional terms and the vegetable mix is called a Mire-poix.

INGREDIENTS:
-5-6 good quality, hormone free, grass fed (if possible), large beef bones*
-2 medium onions large chop
-3 carrots peeled & chopped
-2 celery stalks, peeled, chopped
-1 bunch parsley
-4 Bay leaves
-2 cloves garlic
-salt & paper to taste
-1 Tbsp apple cider vinegar
-3 Tbsp olive oil

METHOD:
preheat oven to 375 degrees F

Lay your bones out on a parchment lined tray & roast in your preheated oven for 20-25 minutes.


Use a large stockpot, add 3 tbsp olive oil & heat.
Sauté the onions until translucent then add celery and carrots, cook for 2 minutes while stirring occasionally. When vegetables are ready stack bones in carefully, add the rest of the ingredients, minus the vinegar, then add water to cover.


Lastly, add vinegar, stir & bring to just the beginning of a boil. Quickly reduce temperature to a very low simmer. Do not cover!


(I start this recipe very early in the morning.) Allow to cook for 24 hours, every 2-3 hours add 1-2 cups water. Before you go to bed add 2 cups water. During the night, I wake up once to check it & add a bit more water.
When you wake, be careful to strain the stock using an equally big stock pot to catch the liquid you waited so long for.
DO NOT SKIP THE FOLLOWING STEP, YOU COULD END UP WITH FOOD POISONING, AS HOT STOCK CAN TAKE UP TO 7 HOURS TO COOL IN THE FRIDGE!
Place the pot in a bain-marie (cold water bath) in your clean sink, with water that has ice cubes that surround the stock pot-not in the broth! You will need to add ice 2-3 times before it will bring the temperature down enough for you to be able to transfer it to smaller containers. Stir to evenly cool the broth. (If you want to reduce some of the broth for a more intense & robust flavour for a particular recipe, scroll down the page as I have included instructions.)
At this point I usually freeze a lot in ice cube trays, then keep a bit of it for imbibing during the week, I keep the beef tallow for cooking along with reducing some of the broth for recipes. Sometimes I refrigerate the broth to get it all cold & gelatinous before dividing it into containers.


To reduce bone broth, simply take 4 cups broth, place it in a pot & simmer on a low heat until half the liquid is reduced.

*you can use chicken bones in place of beef bones. I use at least 2 chicken (whole carcasses) that I roast and 1 carcass that is not roasted, to give a lot of flavour & depth to my broth. The other ingredients/instructions remain the same.


Remember to be patient and treat your stock with love! Let me know how this recipe works out for you or just leave a comment below.