Translate

Sunday, November 30, 2014

Gluten-free Lime Meltaway Cookie Recipe

We are back to our 12 day Christmas Cookie Recipes and today is an easy roll and slice cookie that originates from Martha Stewart. It was simple to remove the gluten, I changed the recipe a touch because I wanted a nice crispness and texture when you bit into it. It's basically a mini shortbread jazzed up with zest from citrus fruits.


Gluten-free Lime Meltaway Cookie:
Difficulty : Easy
Cost Range: Low
Time : 25 mins (does not include chill times)
Yields: 5-6 dozen cookies
Freezes: Beautifully 1-3 months
Preheat Oven to 350° F

INGREDIENTS:

1 3/4 Cup GF Flour Mix #1 (recipe follows after this one)
1Cup Icing Sugar
*Zest of 2 Limes
*4Tbsp Lime juice
3/4 Cup Unsalted Butter
1 tsp Xanthan Gum
2 Tbsp Arrowroot starch or Corn Starch
1/4 tsp Sea Salt
1 Tbsp Real Vanilla Extract
2 Cups Sifted Icing Sugar for tossing cookies in. DO NOT ADD TO DOUGH RECIPE!

METHOD:
-In a separate bowl, mix flour, xanthan gum, salt, & arrowroot starch. Keep aside.

-In a mixer beat sugar and butter together.

-Add zest.
*These can be made with Lemons instead of Limes, the amounts are the same just change the fruit. *

-Add flour in three parts, when adding the last addition, add vanilla extract & lime juice to help moisten the dough a bit.

-Roll dough in parchment paper to for logs, the size should not be bigger than a quarter. I make mine very small, the size of a nickel, because I like them that way but it's all your personal preference.

-Freeze dough 2-3 hours or overnight. At this point the dough can be frozen for up to 2-3 months if wrapped properly.

-Preheat your oven, remove dough log, sit on counter for 3-5 minutes. Open and slice to desired size and thickness. Not too thick or the centers won't cook & not too thin or they burn easily.

-Lay out on a parchment paper lined cookie sheet, these don't spread so I place quite a few on the tray with a bit of space between.

-Bake in preheated oven for 6 minutes. Make sure to turn the tray half way after 9 minutes for even baking.

-Cool on tray for 4 minutes and then gently toss still warm cookies in the 2 Cups icing sugar that was sifted.

Bonne Appétit & remember to share a taste tester with someone you love.


GLUTEN-FREE FLOUR MIX #1 RECIPE


(Makes 3 Cups)

2 Cups White Rice Flour (fine ground but not sweet white rice flour, it's too fine for this recipe)
1/3 Cup Tapioca Starch
2/3 Cup Potato Starch (not potato flour)

Method:

-In a bowl, very carefully measure and blend all ingredients together.
So, this a base recipe for many cookies. I need to let you know that if you do not take extra care in how you measure these ingredients out it will spell disaster for your recipes. They will taste floury, have a weird silky mouth feel if the wrong flours are used or if too much of a starch is used by accident, and will crumble to crummy sadness. Nothing is worse than doing several batches of cookies with horrible results because you can't figure out that the base flour recipe is to blame before it's too late. Trust me, the extra care you take will show in the wonderful positive results you baked.

Leave a comment below, I love to hear how recipes turn out!

Saturday, November 29, 2014

WIN GLUTEN-FREE DEATH BY CHOCOLATE COOKIES Instagram Christmas Photo Challenge

We have a break today from the 12 days of Gluten-free Christmas Cookie Recipes to launch the Kinkycoconut Gluten-free Christmas Photo Challenge to Win a Death by Chocolate Cookies for you and your loved one. Follow the instagram link by pressing that old instagram button near my Pic on this blog and you will follow both posts that explain it all. You gotta follow the instructions for your chance to win! Best of luck and Happy Holidays!


Friday, November 28, 2014

Salted Chocolate Mocha Cookies

Morning lovelies,
Day 5 of our Cookie journey begins with a recipe that originates from the lovely blogger, Mr. Riley Wilford (hope I got that right) at mydailymorsel.com
I did adjust it to get the gluten out and it has been a grande success that I am having difficulty staying away from, I particularly like them right out the freezer. Weird but true.
The original looked so beautiful and I know my Italian friends love a much stronger & slightly bitter cookie, especially when mingled with coffee. They will be so pleased when they receive these in their Cookie gift tins. This is what the original looks like, they are called espresso brookies because they have a brownie texture :


You can find it here :
http://www.mydailymorsel.com/2014/08/21/salted-chocolate-espresso-brookies/

And here is my gluten-free recipe all modified & scrumptious! I had to add sorghum flour to up the protein factor to get a reasonable brownie like consistency. They came out tasting great, very strong coffee flavour and I added chocolate chips to mine to cut some of the bitterness. To me, it tasted good which is huge because I do not have an appreciation for all things coffee. I am a tea lady so it was amazing that I snagged a few of these. This is my first attempt at this cookie and I have a different method I am going to play with another time to see if I get a different texture and look but for now, they are a yummy cookie and perfect for gift giving. Have fun on your baking adventure!


SALTED CHOCOLATE MOCHA COOKIES

Difficulty: Medium
Cost Range: Low to Medium
Time: Prep-1hour 30 mins (includes chill time) Bake-20 mins
Yields: 36 Cookies depending on size you make them
Freeze: Beautifully, last 1-3 months

Preheat Oven to 325° F

Ingredients:

1/2 Cup Butter, unsalted
10 oz Bittersweet Chocolate
1/2 Cup Cane Sugar
2 Tbsp Instant Coffee with 1/4 Cup hot water, mix together
1/2 Tbsp Kosher salt
2 Eggs
1 Tsp Real Vanilla extract
1/4 Cup Sorghum flour
3/3 Cup #1.5 G.F (Brown Rice) Flour mix (mix recipe follows after this recipe)
1/2 tsp xanthan gum
1/2 tsp Baking Powder
2 Tbsp High-end Cocoa Powder
3/4 Cup Semi-sweet Chocolate Chip
Kosher salt for sprinkling on top of cookies (DO NOT ADD EXTRA SALT IN BAKING DOUGH)

Method:

-In a medium sized bowl over a double boiler, melt chocolate & butter together on medium low temperature.

-In a separate bowl mix gluten-free flours together with cocoa, baking powder & xanthan gum. Blend together & keep flour mix aside until time to use.

-Remove melted chocolate and butter mixture from heat, carefully so you don't get burned. Allow to cool for 5 minutes. Whisk in coffee and vanilla.

-Whisk in sugar & salt to chocolate mixture.

-Add eggs, whisk for 1/2 a minute until combined.

-Gradually add SIFTED flour mixture by whisking in until well combined. Dough will be a bit runny but still thick.

-Cover and chill dough for 1 hour until firm but not rock hard. If you over chill it, just let it sit on the counter for a bit until it softens to a firm state. (Don't panic)

-Shape dough into 1 inch balls, I like to use a scooper I bought that is the perfect size and then give them a slight roll into perfectly shaped ballzinies! Place on cookie sheet that has been prepped with parchment paper-not greased! You don't need to grease anything when you use parchment paper and remember you can reuse parchment paper sheets several times. I lay out the cookies 3 down and 4 across because they do spread, on a slightly larger tray I will do 5 across.

-Make sure the cookies are 2 inches apart, gently, use the flat part of your palm to press them down a bit. Not too flat, you are making them a bit flat but not making a pancake! Gentle.

-LIGHTLY sprinkle the top of each Cookie with a very tiny pinch of Kosher salt.

-Chill in freezer for 5 minutes.

-Bake in preheated oven for 10 minutes . I bake for 5 minutes and turn the tray around then add the last 5 minutes. This is to ensure even baking, I find this helps a lot with gluten-free baking.

-Allow to cool on the tray for 3-4 minutes before transferring to a cooling rack.

Bonne Appetit & Share a taste tester with the one you love!


GLUTEN-FREE FLOUR MIX #1.5 RECIPE

(Makes 3 Cups)
1 Cup White Rice Flour (fine ground but not sweet white rice flour, it's too fine for this recipe)
1 Cup Brown Rice Flour
1/3 Cup Tapioca Starch
2/3 Cup Potato Starch (not potato flour)

Method:

-In a bowl, very carefully measure and blend all ingredients together.
So, this a base recipe for many cookies. I need to let you know that if you do not take extra care in how you measure these ingredients out it will spell disaster for your recipes. They will taste floury, have a weird silky mouth feel if the wrong flours are used or if too much of a starch is used by accident, and will crumble to crummy sadness. Nothing is worse than doing several batches of cookies with horrible results because you can't figure out that the base flour recipe is to blame before it's too late. Trust me, the extra care you take will show in the wonderful positive results you baked.

Leave a comment below, I would love to know about how this recipe worked out for you.


Thursday, November 27, 2014

More pictures for Icy Spiced Pumpkin Raisin Cookies

I apologize for the disjointed post pictures but my net is down at home this morning and I am relegated to posting from bloggeroid. Which is infuriating to say the least, because it only allows me to past a few pictures where it wants them in my post. Here are the last of them and I will adjust these once my net is back. Have a beautiful & blessed day. HAPPY THANKSGIVING to my friends South of the border!


Gluten-free Icy Spiced Pumpkin Raisin Cookie

ICY SPICED PUMPKIN RAISIN COOKIES

Difficulty: Medium
Cost Range: Low to Medium
Time: Prep-60 mins (includes chill time) Bake-20 mins
Yields: 70 Cookies depending on size you make them
Freeze: Beautifully, last 1-3 months

Preheat Oven to 350° F

Ingredients:

3/4 Cup Butter, unsalted and softened
1/4 Cup Vegetable shortening
1/4 Cup Cane Sugar
3/4 Cup Dark Brown Sugar
2 Tbsp Black Strap Molasses
1/2 tsp Sea salt
2 Eggs
1 Egg Yolk
1 Tbsp Real Vanilla extract
1 Cup G.F. Flour mix #1 (mix recipe follows after this recipe)
1 Cup #1.5 G.F (Brown Rice) Flour mix (mix recipe follows after this recipe)
3/4 Cup Sorghum Flour
1 Cup Ground Pecans
11/2 tsp xanthan gum
1/2 tsp Cream of Tartar
1 tsp Baking Powder
1 Cup Pumpkin Puree
1/2 Cup Soaked Thompson Raisins
1 tsp Ground Ginger
1 tsp Ground Cinnamon
1/4 tsp Ground Clove


1 1/2 Cups Cane Sugar for Rolling (DO NOT ADD IN BAKING!!!)

Method:
-In a bowl, pour 1 Cup boiling water over raisins.

-In a blender Puree soaked raisins that you drained of water, puree them with 3 Tbsp water until forms a thick paste.

-In a separate medium sized bowl, mix flours together with baking powder, xanthan gum, & cream of tartar. Blend together & keep flour mix aside until time to use.

-In a standing mixer with paddle attachment or using a small hand mixer, in the bowl beat butter and shortening for about 1 minute.

-Add dark brown & cane sugars(not the sugar for rolling) and salt, beat for about 2 minutes until light and fluffy.

-Add yolk & eggs, beat for 1 minute until well combined.

-Add the molasses & beat for 30 seconds, add all the spices and beat for another thirty seconds.

-Add ground pecans

-Gradually add flour mixture in 3 parts on a low setting so flour does not go flying everywhere, add a bit of vanilla to each part you add to keep the dough from being too dry, beat until well mixed.

-Cover and chill dough for 1/2 hour until firm but not rock hard. If you over chill it, just let it sit on the counter for a bit until it softens to a firm state. (Don't panic)

-Shape dough into 1 inch balls, I like to use a scooper I bought that is the perfect size and then give them a slight roll into perfectly shaped ballzinies! Place on cookie sheet that has been prepped with parchment paper-not greased! You don't need to grease anything when you use parchment paper and remember you can reuse parchment paper sheets several times. I lay out the cookies 3 down and 4 across because they do spread, on a slightly larger tray I will do 5 across.

-Set up a bowl with half the Cane sugar you kept for rolling. Add more as you need to.

-Roll each dough ball in the sugar until lightly and evenly coated. Place back on baking tray. Same as before 3 down, 4 across.

-Make sure the cookies are 2 inches apart, gently, use the flat bottom of a glass to press them down flat a bit. Not too flat, you are making them a bit flat but not making a pancake! Gentle.

-Chill in freezer for 5 minutes.

-Bake in preheated oven for 20 minutes. I bake for 10 minutes and turn the tray around then add the last 10 minutes. This is to ensure even baking and colour, I find this helps a lot with gluten-free baking.

-The cookies should look like they are icy on top thanks to the process of rolling them in cane sugar before baking, a light brown on the bottom. Allow to cool on the tray for 3-4 minutes before transferring to a cooling rack.

Bonne Appetit & Share a taste tester with the one you love!


GLUTEN-FREE FLOUR MIX #1 RECIPE


(Makes 3 Cups)

2 Cups White Rice Flour (fine ground but not sweet white rice flour, it's too fine for this recipe)
1/3 Cup Tapioca Starch
2/3 Cup Potato Starch (not potato flour)

Method:

-In a bowl, very carefully measure and blend all ingredients together.
So, this a base recipe for many cookies. I need to let you know that if you do not take extra care in how you measure these ingredients out it will spell disaster for your recipes. They will taste floury, have a weird silky mouth feel if the wrong flours are used or if too much of a starch is used by accident, and will crumble to crummy sadness. Nothing is worse than doing several batches of cookies with horrible results because you can't figure out that the base flour recipe is to blame before it's too late. Trust me, the extra care you take will show in the wonderful positive results you baked.

Leave a comment below,I would love to know about how this recipe worked out for you.
Posted by Kiki Wade at 6:13 AM No comments:

GlUTEN-FREE FLOUR MIX #1.5 RECIPE


(Makes 3 Cups)

1 1/2 Cups White Rice Flour (fine ground but not sweet white rice flour, it's too fine for this recipe)
1/2 Cup Brown Rice Flour (fine ground, not gritty big grainy)
1/3 Cup Tapioca Starch
2/3 Cup Potato Starch (not potato flour)

Method:

-In a bowl, very carefully measure and blend all ingredients together.
So, this a base recipe for many cookies. I need to let you know that if you do not take extra care in how you measure these ingredients out it will spell disaster for your recipes. They will taste floury, have a weird silky mouth feel if the wrong flours are used or if too much of a starch is used by accident, and will crumble to crummy sadness. Nothing is worse than doing several batches of cookies with horrible results because you can't figure out that the base flour recipe is to blame before it's too late. Trust me, the extra care you take will show in the wonderful positive results you baked.

Leave a comment below,I would love to know about how this recipe worked out for you.


Wednesday, November 26, 2014

Gluten-free Classic Chocolate Chip Cookie


For day 3 of the 12 days of holiday cookie recipes I am including a classic stand by. This is the chewy, moist, chocolate chip cookie goodness that you remember from your childhood. Very easy and fast to make, perfect beginner recipe and always loved by so many people. I had to make a second batch of these because so many disappeared when they came out of the oven all hot and fresh.

Gluten-free Classic Chocolate Chip Cookie:
Difficulty : Easy
Cost Range: Low to medium
Time : 1 hour 20 mins (this includes both chill times and baking)
Yields: 30-36 cookies
Freezes: Beautifully 1-2 months
Preheat Oven to 375° F
INGREDIENTS:

1 1/3 Cup Unsalted Butter Melted
3/4 Cup Dark Brown Sugar
1/2 Cup Raw Sugar
1 Egg
1 Egg Yolk
1 1/2 tsp Xanthan Gum
1 tsp Baking Soda
1 tsp Sea Salt
1 1/2 Cup GF Flour Mix #1.5 (recipe follows)
3/4 Cup Brown Rice Flour
3/4 Cup Sorghum Flour
1 tsp Real Vanilla Extract
3/4 Cup Semi-sweet Chocolate Chips

METHOD:
-In a separate bowl, mix flours, xanthan gum, salt, & baking powder.
-In a mixer beat sugars and melted butter together.
-Add eggs, beat.
-Add flour in three parts, when adding the last addition, add vanilla extract to help moisten the dough a bit.
-Add chocolate chips last and beat until incorporated.
-Chill dough for 45 minutes
-Scoop about 1 tbsp for each cookie and roll into a ball, place on parchment lined baking tray. 3 down and 4 across.
-Flatten a bit and put in freezer for 5 mins.
-Bake in preheated oven for 10 minutes. Make sure to turn the tray half way after 5 minutes for even baking.
-Cool on tray for 3 minutes and transfer to rack to finish cooling.
Bonne Appétit & remember to share a taste tester with someone you love.


GLUTEN-FREE FLOUR MIX #1.5 RECIPE


(Makes 3 Cups)

1 1/2 Cups White Rice Flour (fine ground but not sweet white rice flour, it's too fine for this recipe)
1/2 Cup Brown Rice Flour (fine ground, not gritty big grainy)
1/3 Cup Tapioca Starch
2/3 Cup Potato Starch (not potato flour)

Method:

-In a bowl, very carefully measure and blend all ingredients together.
So, this a base recipe for many cookies. I need to let you know that if you do not take extra care in how you measure these ingredients out it will spell disaster for your recipes. They will taste floury, have a weird silky mouth feel if the wrong flours are used or if too much of a starch is used by accident, and will crumble to crummy sadness. Nothing is worse than doing several batches of cookies with horrible results because you can't figure out that the base flour recipe is to blame before it's too late. Trust me, the extra care you take will show in the wonderful positive results you baked.

Leave a comment below, I love to hear how recipes turn out!

Monday, November 24, 2014

Holiday 12 days of Gluten-free Christmas Cookie Recipes Launched!

Holiday Jam Thumbprint aka Swedish Pastries Cookie Recipe


Good Morning Lovelies!

It's actually raining in my neck of this rolling conurbation of a city. I don't mind it one bit, I do so love the rain. It's perfect weather to launch:
The Kinky Coconut 12 Days of Gluten-Free Christmas Cookie Recipes! 
Today is this recipe:
 
These are recipes from my kitchen to yours, some are recipes I have created, converted from other sources- that I will give their due, and some are family traditions that I tweaked to make gluten-free. I wanted to give you something you could use to get a leg-up on your holiday baking. In my home I give these as gifts in cookie tins, a tradition that started 16 years ago when I was a very broke single parent. Ingredients were much less expensive than today, I was on a super tight budget, and having gone to culinary school I thought it best to put those talents to use. So I baked my Christmas gifts that year and they were a huge hit! The next year Christmas came and I was better able to afford gifts, so I gave store bought items. Well, everyone was disappointed and asked where the cookies were and why didn't I give those again? I loved that because it was heart warming, people I knew and loved or who were just acquaintances truly preferred something homemade with love over store bought prezzies. Never underestimate the homemade gift, it shows you care, is different than what everybody else is doing, & will give both the giver and receiver that warm, tingly, happy feeling we all like during the holidays. It will also cost less if you plan ahead and budget yourself accordingly, I know ingredients have gone up in price but I have a few suggestions for that which will help to ease the financial burden. I will also add some professional Chef tips that are used in the industry and really work.
I will list them now and right after the tips the recipe will follow, with a break-down in pictures.

Tips to Save Money on Homemade Holiday Gift Giving Treats :

  • Make lists of the following, it's uber important so you stick to budget and stay sane:
  • The people you want to give cookie tins to.
  • The cookie recipes you want to bake to give to friends, family, co-workers, anybody else that is special. Remember to add notes to that list of special dietary needs and considerations. Do they have allergies to eggs? Are all nuts a problem or only certain kinds? Are they diabetic or suffer an autoimmune disorder that requires no refined sugars? Are they on a diet? Be sure to ask yourself these questions and know the answers before hand, then you can decide if it's appropriate or not to give your cookie gift. For allergy or illness sufferers, I will give said individual fewer items that are special tailored to them and make those recipes before baking anything else. Then I wrap them and tuck away those well-marked gift tins so there is no mistake made that could cause illness or death-yes, allergies and health difficulties are that serious for sufferers so be thoughtful and respectful.
  • Figure out your budget and then hack away at your list to keep it on point. Your recipes will dictate ingredients and equipment you need, be realistic as to your talent level in baking when choosing recipes. There is nothing wrong with basic, easy level choices, even us professionally trained Chefs started as newbies. Keep it simple. Choose recipes you can actually afford the ingredients for and that will please those you are giving to. You are trying to save money not end up broke to the point of feeling suicidal. 
  • Remember, these are hand-made, slaved-in-a-kitchen, gourmet, real ingredients gifts. You can choose to give them to people who really care and that you really care about. I prefer to give a surprise tin to the maintenance person that nobody ever pays attention to than the douche who isn't going to appreciate it and just piss and moan. (Yes, we all know someone like that)
  • Go to places like Costco or if you have a place that caters wholesale to smaller businesses, buy your ingredients there. Here in Montreal we have places like Aubut and Provigo Entrepot that sell in bigger quantities and you really notice the difference. I also buy at Costco because they carry a wide range of items that are gluten-free, for example, Vanilla. Their Kirkland signature brand REAL Vanilla costs just under $9.00 for a 473ml container versus almost $10 or more for a 43ml Real vanilla counterpart. (These prices are as of the date this post was published, prices like the times change-do your homework.)
  •  Bulk Stores are awesome, the one's with the bins. Just be careful to make sure there is no cross contamination of ingredients if you are a gluten illness sufferer like yours truly. We have this wonderful place called Bulk Barn and they have dedicated gluten-free sections and it makes life so much easier. It's also much less expensive and better for the environment on a global scale. The reason being is that you are not paying for fancy, expensive packaging, and the marketing that went into selling what's on the inside in super small quantities. That lack of packaging also reduces your  personal ecological footprint and you get to choose the exact amounts you need for a recipe without waste on extra ingredients that get thrown out because they have gotten stale.
  • Try to buy local from those little Mom & Pop shops in your neighborhood that sell stuff with great prices, I know some local fruit and vegetable shops that specialize in dried fruits and nuts/seeds, their prices are great and they often have specials, plus they will give a 10-15% discount if you buy items in bigger quantities. They want your business, be appreciative that local can work in your favor and theirs.
  •  Choose good quality bakeware and equipment the first time around, you will see that these are what you will use for YEARS! Cheap bakeware also end in poor results for baking, burned cookie bottoms and damaged pans will be in your future if you don't heed this warning. Can't afford new ones? Ask mom or other family or friends if you can borrow their bakeware for a special holiday surprise. Treat it like gold and return it beautifully spic and span clean. If you get really stuck, sometimes second-hand shops sell bakeware that needs a good cleaning and parchment paper to give it new life. I also find that thinking ahead when I see sales in say, April or July, yields in fantastic culinary equipment and sometimes ingredient hauls. 
  • Get your gift tins at the dollar store and when you give the tins, let people know that you want them to be a part of helping our environment by keeping those tins and returning them for next years delicious wonders you have planned. Trust me, they want the cookies and eatable treats. They always keep the tin and give them back. I have never ever had a problem with this.
  •  Lastly, do what Chef's do. Read the recipe thoroughly, follow the directions and don't make changes to the recipe until after the first time you try it out the way it has been given. Soften your butter, use real ingredients-no artificial yuckies that are dangerous to people and the planet.Besides, real ingredients make for the best end product. Use fresh ingredients, wash your hands, keep your work space clean and organized. Prepare everything you need before you begin your baking adventure. That means, preheat your oven, make sure you have all the ingredients you need and equipment, do your M.E.P-culinary term for Mise-En-Place=measure out and weigh all your ingredients in seperate bowls and containers and have them laid out in front of you before you begin. Also, invest in some parchment papers, Chefs know that these save a load of dinero because greasing with butter gets expensive and parchment can be reused over and over again, once the paper has become a VERY dark brown you need to replace it with a new one.I bought a big box for around $78 and have had it for 3 years now, very economical and I use it every time I bake or cook. Versatile and money saving-double win!
  • Wash your hands before you begin any  recipe and in the kitchen, and when baking take your time. Baking is actually science, you can't cut corners, you must respect weighing, measuring, and recipe instructions properly, if you want to succeed and not waste all your hard earned money on failed attempts.
  • Lastly, remember to have fun, get messy, and make mistakes in the kitchen. Even the top Chefs in the world have had their fair share of culinary disasters. Don't get discouraged, ask for help when you need it, and laugh mistakes off. Then have a cup of tea and a cookie before you head back to the drawing board. You'll have a story or two to tell on Christmas day when you give your gifts to eager hands.

So, this a cookie that is my favourite of all time, is one of my more expensive recipes-although not as pricey as my Paleo that will be posted eventually, it's also a bit of an advanced level cookie but if you stick to the instructions properly and revert back to the pictures as you need to, you should be fine. Leave any comments or questions below about your experience or any suggestions you may have to share if you played around with the recipe after your first try. Happy Baking!
Without further ado, your cookie recipe!

HOLIDAY JAM THUMBPRINT aka SWEDISH PASTRY COOKIES

Difficulty: Medium            
Cost Range: Medium to High
Time: Prep-60 mins (includes chill time)  Bake-20-25mins
Yields: 30-36 Cookies depending on size you make them
Freeze: Beautifully, last 1-3 months (everyone eats them way before that)

Preheat Oven to 350° F
(I double this recipe because this is a holiday favourite amongst gift receivers)
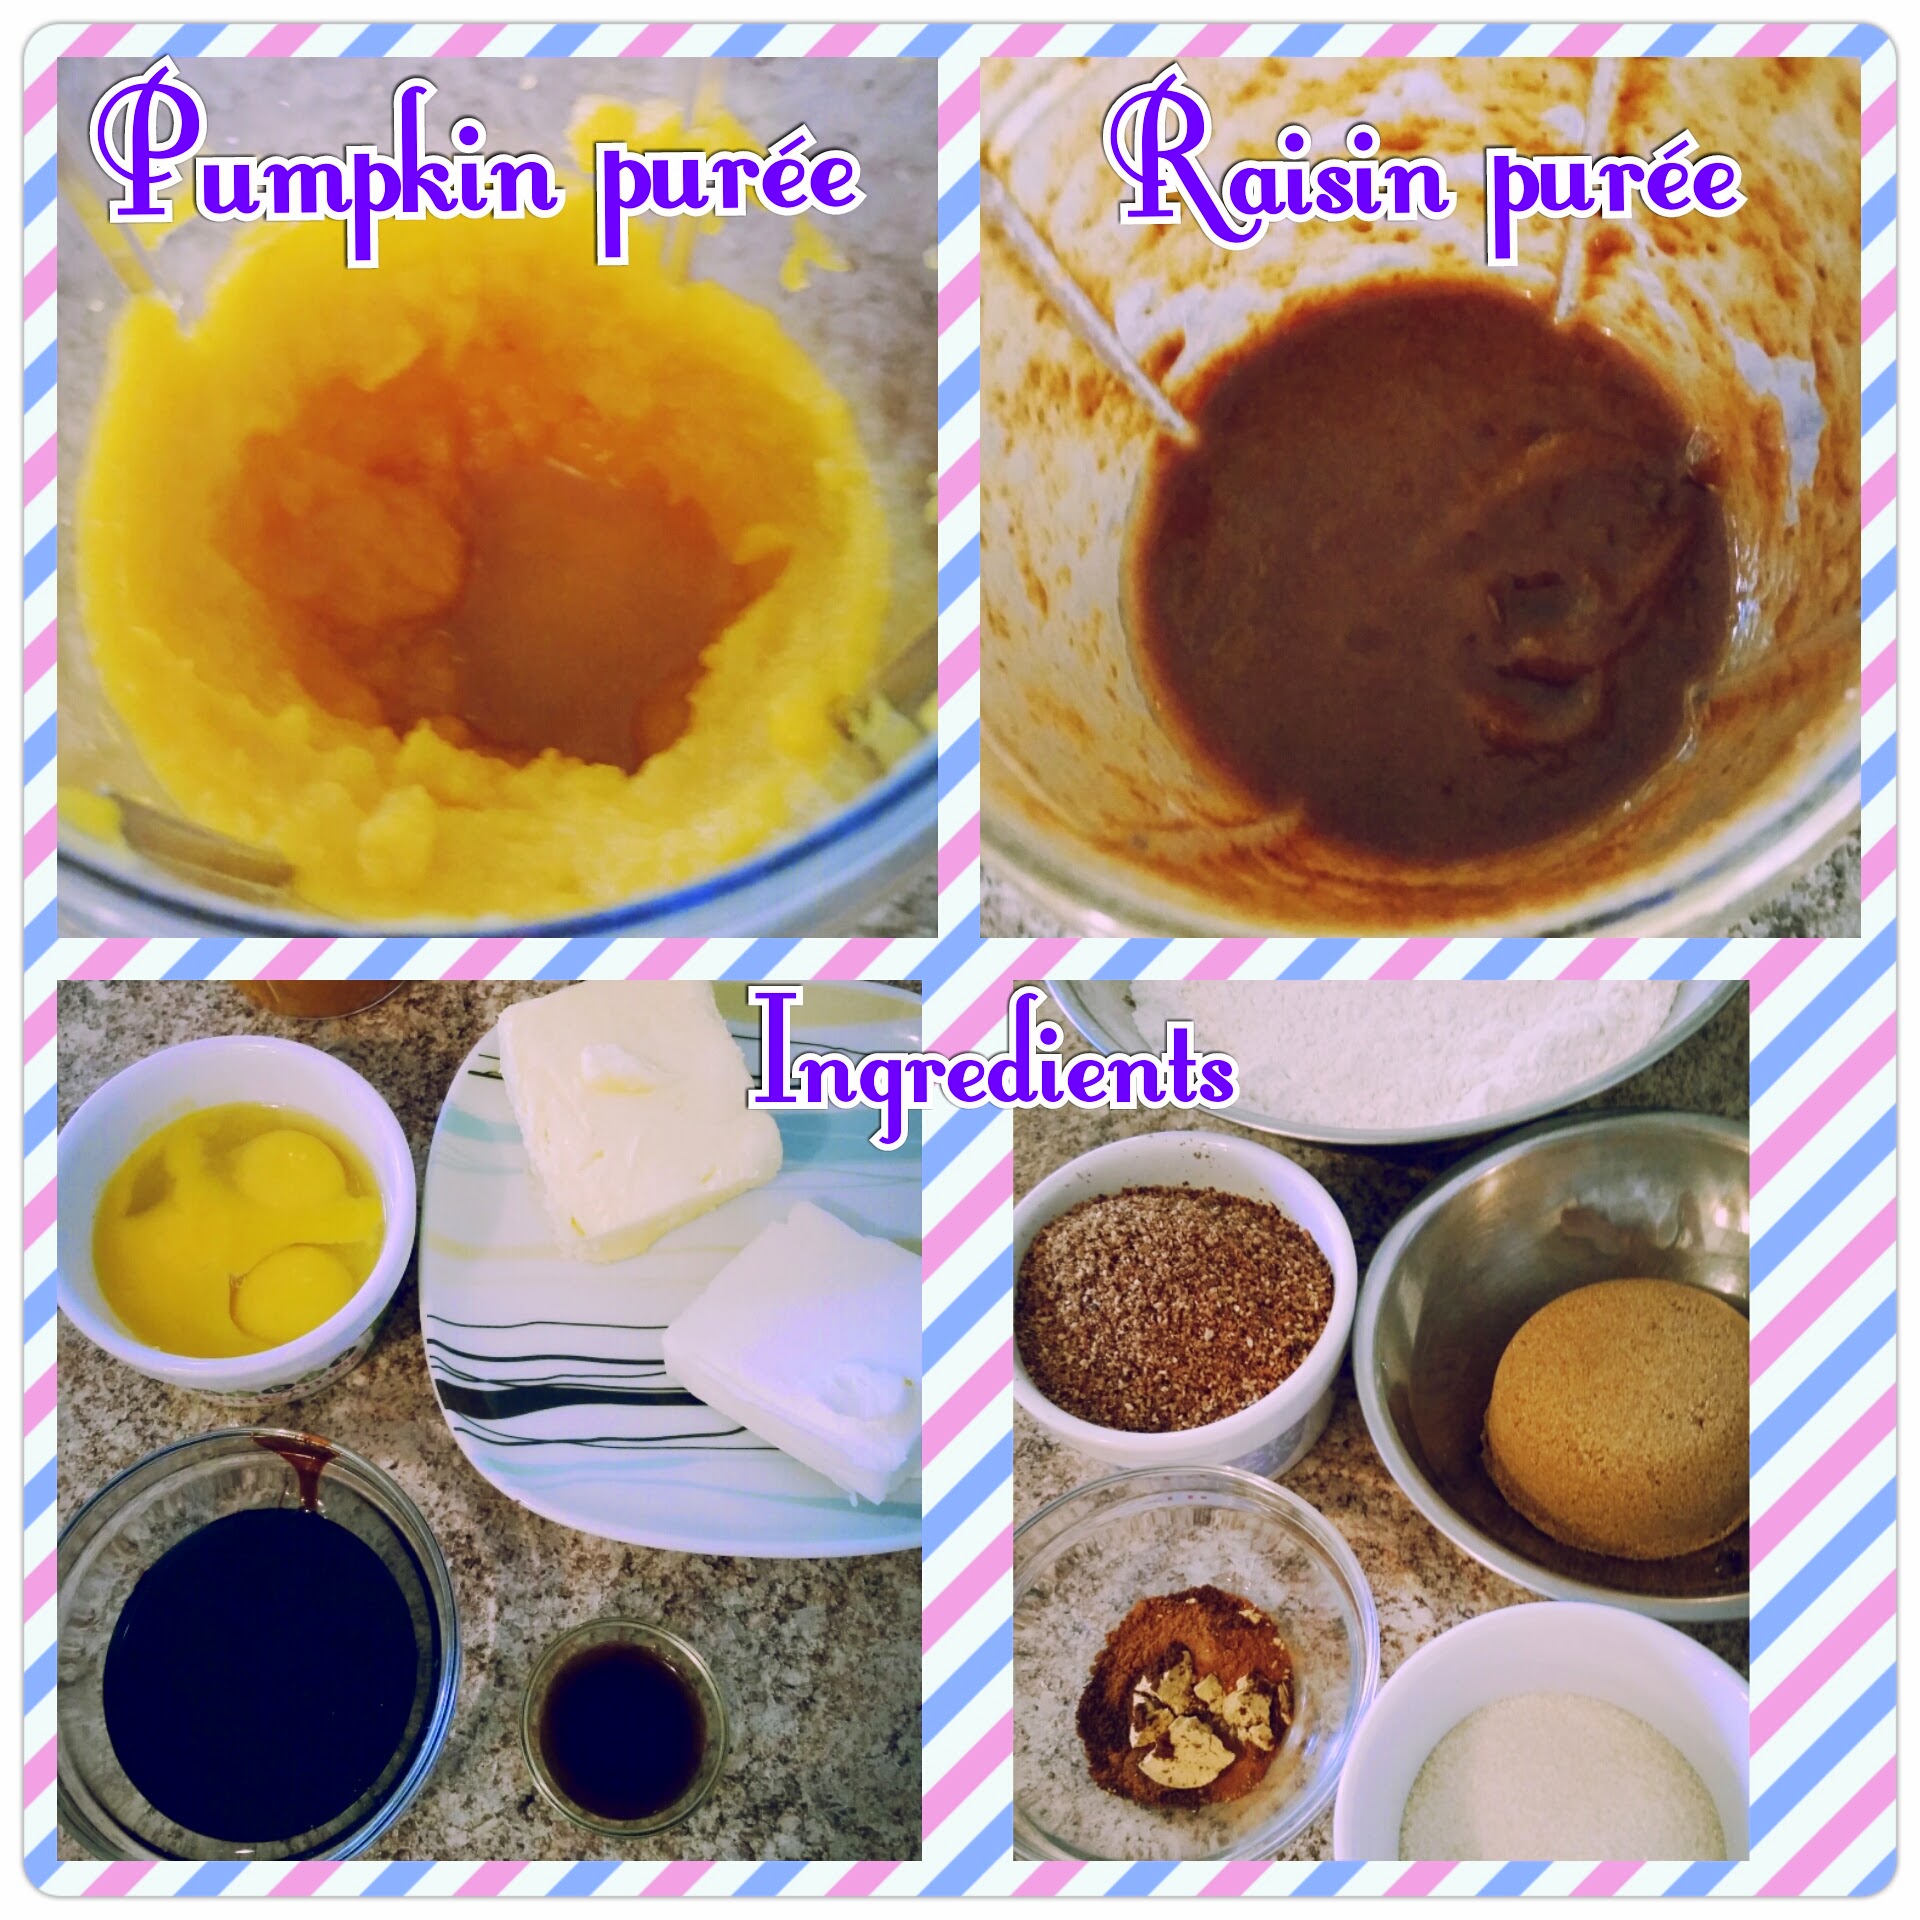
Ingredients:

2/3 Cup Butter, unsalted and softened
1/3 Cup Sugar
1/4 tsp Sea salt
2 Egg yolks
1 tsp Real Vanilla extract
1 1/2 Cups #1.5 G.F Flour mix (mix recipe follows after this recipe)
1/2 tsp xanthan gum (optional, I never use it for this recipe & have never had a problem but if you are worried about crumbly cookies, by all means add it in.)
4 Egg whites
2 Cups Walnuts, ground
1/2 Cup Jam-I prefer black currant, raspberry, and apricot. Use what you like.

Method:  

-In a standing mixer with paddle attachment or using a small hand mixer, in the bowl beat butter for about 1 minute.

-Add sugar and salt, beat for about 2 minutes until light and fluffy.

-Add yolks-NOT THE WHITES! And add the vanilla, beat for 1 minute until well combined.

-Gradually add flour mixture on a low setting so flour does not go flying everywhere, beat until well mixed.

-Cover and chill dough for 1/2 hour until firm but not rock hard. If you over chill it, just let it sit on the counter for a bit until it softens to a firm state. (Don't panic)

-Shape dough into 1 inch balls, I like to use a scooper I bought that is the perfect size and then give them a slight roll into perfectly shaped ballzinies! Place on cookie sheet that has been prepped with parchment paper-not greased! You don't need to grease anything when you use parchment paper and remember you can reuse parchment paper sheets several times. I lay out the cookies 3 down and 4 across because they do spread, on a slightly larger tray I will do 5 across.

-Set up a bowl with half the egg whites (I keep the other half in case any goopy egg white threads sully my bowl of ground nuts, forcing me to throw away and start again-ugh!)

-Set up another bowl with half the ground walnuts (I keep the other half so I don't lose expensive nuts thanks to goopy egg white glob threads sneaking into my nut bowl, causing major stickage that forces you to toss the nuts)

-Roll each dough ball in beaten egg white, one at a time, and then roll in the ground walnuts to coat. Use one hand for rolling in egg goop and the other hand only for rolling in nuts. Place back on baking tray. Same as before 3 down, 4 across.

-Make sure the cookies are 2 inches apart, gently, use your thumb to press down the center of each dough ball-not too deep, you are making a well not digging a hole to the center of the earth! Gentle.
Adjust with your finger if needed.

-Add in about 1/2 tsp of jam to each cookie well, (take a selfie with your magnificent dough triumph and post wherever you like) and bake in  preheated oven for 20-25 minutes. I bake for 15 minutes and turn the tray around then add the last 5-10 minutes. This is to ensure even baking and colour, I find this helps a lot with gluten-free baking.

-The cookies should be very pale, a light brown on the bottom. Allow to cool on the tray for 3-4 minutes before transferring to a cooling rack.

Bonne Appetit & Share a taste tester with the one you love!


GLUTEN-FREE FLOUR MIX #1.5 RECIPE


(Makes 3 Cups)

1 1/2 Cups White Rice Flour (fine ground but not sweet white rice flour, it's too fine for this recipe)
1/2 Cup Brown Rice Flour (fine ground, not gritty big grainy)
1/3 Cup Tapioca Starch
2/3 Cup Potato Starch (not potato flour)

Method:

-In a bowl, very carefully measure and blend all ingredients together.
So, this a base recipe for many cookies. I need to let you know that if you do not take extra care in how you measure these ingredients out it will spell disaster for your recipes. They will taste floury, have a weird silky mouth feel if the wrong flours are used or if too much of a starch is used by accident, and will crumble to crummy sadness. Nothing is worse than doing several batches of cookies with horrible results because you can't figure out that the base flour recipe is to blame before it's too late. Trust me, the extra care you take will show in the wonderful positive results you baked.

Leave a comment below,I would love to know about how this recipe worked out for you.

Thursday, November 20, 2014

Strawberry Tang Lettuce Wrapped Juice


Strawberry Tang Lettuce Wrapped Juice:
3 Cups strawberries
3 Lettuce Leaves
1/2 a Lime, peeled
6 Mint leaves
1/2 Cup Spring water

Method :
Blend lettuce with water and mint
Running all ingredients through your juicer and enjoy!

Wednesday, November 19, 2014

Minted Ginger Mango Mist Juice

The holiday season is upon us and people are hustling, bustling, planning, and coping with the joy and stressors of the season. I find that all of those things lead to restless sleep, frazzled nerves, and a lot of perpetual feelings of tiredness. Juicing is a wonderful way to get extra nutrition, boost energy levels, and easily do something your body will quickly thank you for.
Here is a great recipe to brighten your morning.


MINTED GINGER MANGO MIST JUICE:

Ingredients:
1 1/2 Cups Mango
1/2 Cucumber peeled
1/4 Fennel Bulb
1 Stalk Celery
2 Gala Apples
10 Mint Leaves
1/2 Lime, peeled
1/2 Cup Coconut Water
Knob ginger, peeled

Throw it all in your juicer and serve over ice. Tastes even vetter when you share it with someone you love. Enjoy!

Monday, November 17, 2014

It came!

An early Christmas present arrived today. I feel so grateful and blessed, God has been answering the prayers I have spoken aloud and the quiet one's in my heart.
I received this book as a free gift on the Grace to you website. Check them out, there are some wonderful Christian books and loads of other materials.
www.gty.org

Blog Newbie


So, I am learning the ins and outs of blogging on blogger, I decided that it was time to take blogging more seriously or give it up. The first of the two choices won out but I am pulling my hair out and reminding myself to take breaks so I actually get this done. I am also of a mind that chocolate and Earl Grey decaff tea are a big help, along with all the wonderful bloggers that have come before me and have been kind enough to share their wisdom and how-to's. I will post links to those blogs when I get this figured out and have it all organized, for now, please bear with me and all the changes. I am not a tech person at all and as embarrassing as it may be, it is honest. Hey, I'm a Chef, I make you a beautiful meal and a dessert to knock your socks off; post on a blog? Maybe, not so good. lol!
I am really trying to get a recipe index set up among other things to make holiday baking easier, it will come. In the mean time, another cup of tea is in order along with a positive quote pic.

Friday, November 14, 2014

Holiday Organization

I am so grateful to God for answering my prayers, I am finally sleeping and it's making a huge difference. I feel all revved up and ready to go. Today we are clearing out, fixing up, setting up, organizing, and deciding what is happening for holiday decorating and baking. I have been wanting to do a holiday season, gluten-free, cookie set of recipes for quite some time, and I think this year is perfect. I will be posting pics and recipes, and I will also be posting some gift ideas you can make yourself along with a photo a day challenge for December. Keep an eye out and have a blessed weekend!