Translate

Showing posts with label Seafood. Show all posts

Thursday, April 28, 2016

Trout w/ Seasoning & Roast Vegetables, Day 29 of The 30 Day Self-LoveDetox Challenge

Morning health warriors,

It's day 29 and we are almost at the finish line for our 30 day challenge. Because we end tomorrow, today's post is a recipe for this scrumptious fish dish. I want you to have a few more healthy recipes to add to your roster, that are simple and taste great!
It uses a West Indian spice mix that I get from the specialty shop. These spices can also be found on amazon.
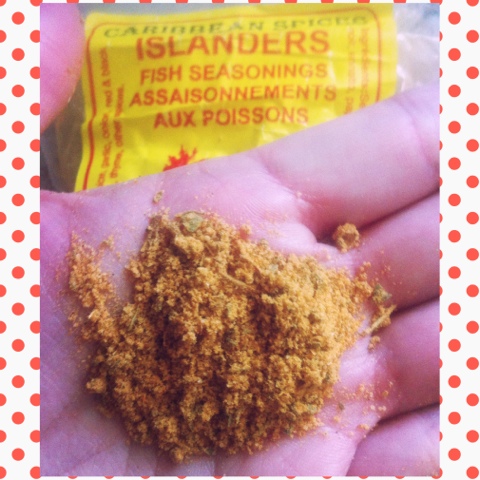
There are several brands you can choose from, ranging from fish seasoning's to jerk seasoning. Jerk seasoning is very spicy but the fish seasoning is not, it contains papaya and I find people find it tastes so good. I have gotten non-fish eater's to gobble up their serving and ask for seconds. The one I use is called Islander's Fish Seasoning, and it looks like this:
That's the packaging and this is what the spice looks like:
These are some of the other companies:


ROASTED VEGETABLES
Preheated oven to 375 degrees F
Ingredients:
1 Red pepper, seeded and sliced
1 Zuchinni sliced into sticks
1 Yellow onion sliced
1 Pkg Sliced Mushrooms
Herb seasoned salt like Herbamare
Black pepper
Dried thyme

Method:
-On a parchment lined tray lay each vegetable out in its own row. A line of peppers, a line of onions, a line of mushrooms, and a line of zucchini.
-Sprinkle seasonings over vegetable to taste, I use about 2 tsps combined, total.
-Sprinkle about 2-3  Tbsp over vegetables.
-Place tray in oven and roast for 1 hour until well cooked. 
-Serve with fish and salad


TROUT WITH ISLANDER'S FISH SEASONING & ROASTED VEGETABLES
Ingredients:
1 Filet of trout
1/2 tsp Fish seasoning
1/4 tsp Fresh black pepper
1/2 tsp Fresh thyme
1 Clove garlic crushed
1 tsp Extra virgin olive oil

Method:
Preheat oven to 375 degrees F
-Wipe down filet with a paper towel
-Sprinkle spices all over the fish
-Spread garlic over fish
-Sprinkle olive oil over fish
-Bake in preheated oven for 15-20 minutes until fish is flaky and cooked through.
-Serve with roasted vegetables and side salad.

The salad recipe is the avocado scallion salad from another post, you can find it in the labels section below.
Come back tomorrow and have fun making this recipe.


Tuesday, February 17, 2015

Garlicky Herb Dressing on Tuna Salad


So, today is a simple recipe for a dressing to add some serious flavour kick to those often boring, chemical laden, unhealthy, tuna salads. I find this pairs very well with tuna but feel free to play around with chicken or any other low fat protein.

GARLICKY HERB DRESSING
Ingredients:

1/2 Cup Extra virgin olive oil
1/4 Cup Apple cider vinegar
1 Clove medium sized garlic-crushed
2 tsp Dried basil
2 tsp Dried oregano
1/2 tsp Dried garlic powder
1/2 tsp Dried onion powder
1/4 tsp Dried thyme
1/2-1 tsp Fresh ground black pepper
1/4-1 tsp Kosher salt

Place all ingredients in a container with a tightly fitting lid, shake up until well mixed. Let sit for 10 mins. Shake well before serving.
I use 2 Tbsp of dressing on my salad, it's very powerful in taste so go easy. Some people like 3 Tbsp, taste as you go.
I saved this on a salad of 1 head Romaine lettuce, chopped, 1 carrot grated, 1cucumber-peeled,de-seeded, chopped, 1 red pepper sliced.
The dressing lasts 1 week in the fridge.
Enjoy and let me know how it goes for you should you try it out, I love to read your comments.

Friday, February 22, 2013

Garlicky Lime Fish

This is the easiest recipe ever, it's great when you are in a crunch, feeling tired, lazy, or not sure what to do with your fish but want it to taste good. As always pics follow to guide you.

Garlicky Lime Fish:
Ingredients
-4 Tilapia filets or any white fish you prefer
-4 Cloves garlic
-S&P (salt & pepper)
-1 Fresh lime
-1/4 Cup Extra Virgin Olive Oil
Method:
-Place fish in a heat-proof, non-reactive dish.
-Sprinkle with S&P on both sides
-Crush a clove of garlic on each piece of fish & rub it in but only use half of the clove on one side, the remaining half on the other side.
-Pour olive oil over all the fish and rub in gently.
-Zest lime over all the fish, cover and refrigerate 1-4 hours, if you are unable to wait try to give it 15mins before you cook it.
-Preheat your oven to 375F bake fish for 10-15 mins until flakes easily but is not dry.
-Serve hot with vegetable slather , guacamole, or sautéed mushrooms with caramelized onions. Goes well with mashed sweet potatoes and asparagus too!
Makes 2-4 servings depending on the size of your fish and the appetites of those you serve.


Tuesday, February 12, 2013

My Mom's Modified Shrimp Dip-awesome with a cape!

This simple recipe is always a fav. at get together's and has become one my mother gets asked to make repeatedly. It does not last, so if you want extra be prepared to double & triple this recipe because you will end up with an empty bowl.
This recipe uses Pacific white shrimp which from what I have researched is a sustainable seafood, for now. If you should find out differently then please let me know, I like the corrections just be kind about it.

Shrimp Dip Recipe:

Ingredients

-300g (About 31-40 individual shrimps)Extra large Pacific white shrimp, deveined, cooked, and peeled.
-1 Red pepper medium small dice
-1 Green or yellow pepper medium small dice
-1 Small bunch of scallion (4-6 stalks)
sliced thin with the white parts and green.
-1 Bunch curly parsley chopped to equal 1/2 of a cup.
-1 Tbsp Lemon zest freshly zested
-1 tsp Black pepper freshly ground
-1-2 tsp Sea salt
-1-2 1/2 Tbsp Curry powder (this depends on your curry strength preference, I like it a lot)
-2-3 Tbps Home made mayo (Can use Hellman's)
-1/4 Cup Plain yogurt

Method:
- When all veg and shrimp ingredients are measured and prepped, toss them all together in the bowl and mix well.

-Add spices and stir through, it will look kind of like shrimp tabbouleh.

-Add mayo and yogurt and stir through. Let sit in fridge covered for 2-3 hours and serve on crackers. I used sesame rice crackers.

I have included pics below because it is easier to visually see the way to cut, chop, zest, etc. The pictures are in order and show how to get the sizes of what you want for this recipe without fuss.
The peppers are to be cut in strips as shown to achieve the proper dice.
There is also a Chef trick used for parsley, once it has been thoroughly cleaned in cold running water,(make sure no dirt or sand remain or else it will leave grit in your food) Chefs bunch the parsley all together in a wad and leave a bit exposed as they chop it, being careful of fingers and hands. Then they put it on the cutting board and chop back and forth until it's finely chopped. Do not hold your finger on top of the blade as you see in the pic when chopping, ever! I was taking pics one handed and had no choice but to hold it that way. When I can wrangle up some other hands for pics I will have a proper methods section added to this blog. In time my lovelies, I promise in time.
When zesting, I use a microplane zested but a box zester will do. Just be sure to zest only the yellow skin not the whit part known as the pith, it's bitter and not appealing. Only the yellow lemon skin part.
I also happened to of bought shrimps that had the tails on and I know for some people this can be intimidating. Once you have defrosted them, just peel the end of the tail slowly, beginning where there's a natural indentation in the tail shell. When sufficiently peeled you then pinch the tail off by holding the shrimp with one hand as you peel or by laying it flat on a cutting board and holding with one hand as you pinch and pull away from the shrimp.

You will notice this recipe uses home made mayo, I no longer purchase it because it doesn't taste good to me and I don't like food with ingredients I can't pronounce or with artificial muck. This recipe will follow in another post, I forgot to measure and take pics while I made it for this recipe so when I am out of mayo I will make more and post.
In the mayo pics I switch to a plastic spoon for measuring, the reason for this is because a non reactive spoon like plastic or wood will not impart flavour to the mayo and do not cause it to spoil as quickly.
The pictures below are in order, I hope you enjoy this recipe and as always it's gluten free!